With the development of technology, the integration of chips is getting higher and higher, and the packaging is getting smaller and smaller. This has caused many beginners to look at the IC. Do you feel that you can't start with an IC with a soldering iron facing the pin spacing of no more than 0.5mm? This article will detail the soldering method for discrete components such as pin-on-chip ICs, general-pitch SMD ICs, and small packages (0805, 0603 or smaller).
Tools/raw materials
Tools: tweezers, rosin, soldering iron, solder
Raw material: PCB circuit board
First, the dense pin IC (D12) welding
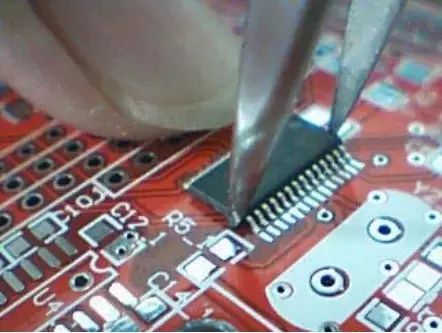
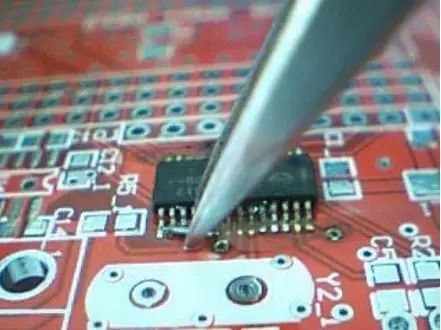
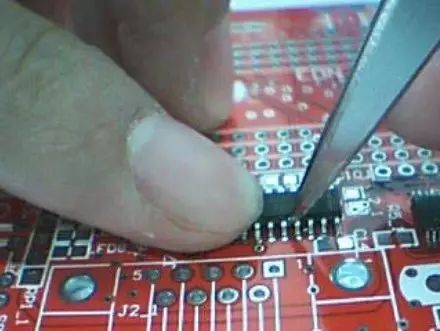
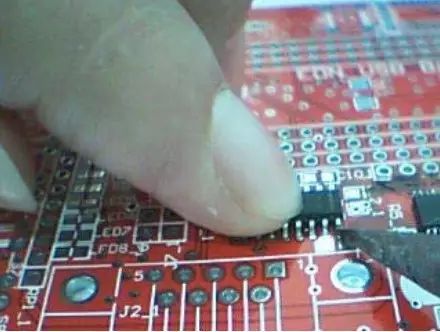
First, sandwich the chip with tweezers and align the pads:
Then hold the chip with your thumb:
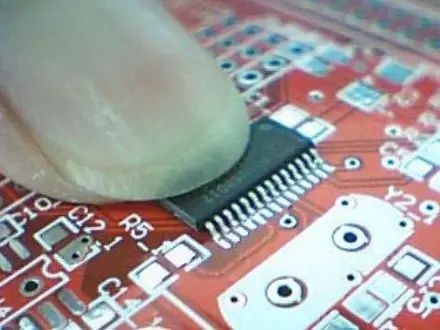
Before proceeding to the next step, be sure to check that the chip is aligned with the pad. Otherwise, it will be more troublesome if the chip is not aligned after the next step.
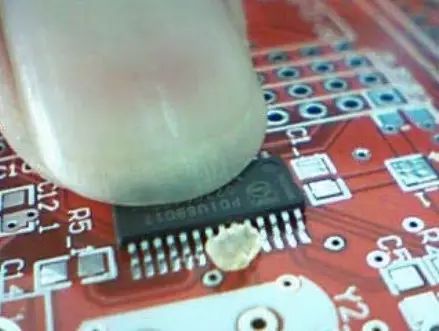
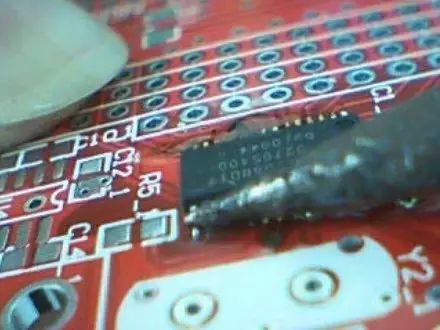
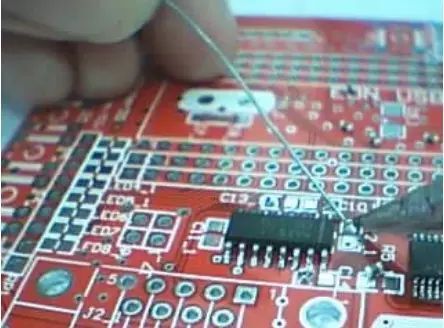
Next, use a pair of tweezers to pick up a small piece of rosin next to the pins of the D12 chip. Note that the rosin is used instead of the thick flux (the flux can't hold the chip):
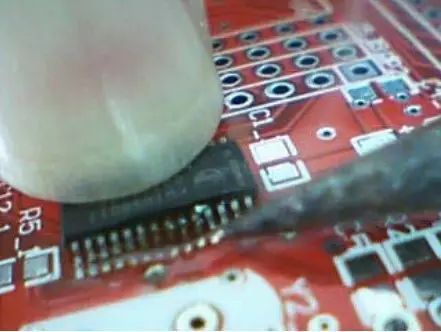
The next step is to turn the rosin away with a soldering iron. Rosin has two functions here: one is to fix the chip on the PCB, and the other is to help solder, huh, huh. When melting rosin, it is necessary to spread the rosin as much as possible and evenly distribute it on a row of pads.
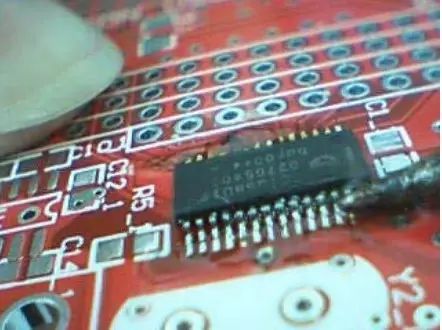
Then use rosin to fix the pin on the other side of D12. After completing this step, D12 is firmly fixed on the PCB, so check whether the chip is accurately aligned with the pad before, or wait for the rosin on both sides. After that, it is not very good.
Next, cut a small piece of solder on the left pad (if you use the left hand to make the soldering iron, put the right side. In this case, the right hand is taken as an example, huh, huh), the solder diameter in the figure is 0.5mm, in fact The size does not matter, it is important to choose how much. If you are not sure how much to put up, it is recommended to put a little less, if not enough solder.
If you accidentally put a lot of it, there is no solution. If you just want a little more, you can drag and drop the excess tin to each pad as you can in the video tutorial. If it is much more You need to use another method. It is recommended to use a tin strip to get the excess solder out.
Solder the solder with a soldering iron, then drag the soldering iron to the right along the pin-to-pad contact point and drag it to the rightmost pin:
In this way, the pins on one side of D12 are soldered, and the other side can be soldered in the same way.
Second, the thin pin IC (MAX232) welding
The above describes the soldering method of the pin IC, but do not use this soldering method on all the chip ICs. The above soldering method feels that the pin is denser and easier to use, basically the pin pitch is less than or equal to The 0.5mm film is so soldered, and the specific operation will look like it. Let's take a look at how to solder the IC with a slightly larger pin pitch. Take the MAX232 on the USB board as an example.
First, solder the solder on the pad on the edge of the die pad:

Then use the tweezers to align the chip to the pad. At this time, the pin with the tin on the pad is pushed up a bit. Find the feeling and put the chip up.
Then use the soldering iron to open the solder on the pad, and press the finger of the chip to make a little force, so that the chip can be closely attached to the PCB, and the pin is soldered. Don't use too much force when pressing down, especially if the solder is too hard before the solder is fully opened, otherwise the pins are bent.
Next, solder the chip at the other end of the diagonal of the chip to hold the chip:

The next thing to do is to solder the remaining pins of the MAX232 one foot at a time. This way MAX232 is also welded, this time without washing the plate, because we do not use rosin (in fact, the solder wire contains a certain amount of flux, it is not rosin, huh, huh).
Third, the welding of small package discrete components
Small package discrete components, that is, resistors and capacitors. Demonstrated here is the capacitor of the solder 0603 package. First, solder a little solder to one of the pads to be soldered:
Then use a pair of tweezers to hold the capacitor, and the soldering iron on the right hand will open the solder on the spot. At this time, use the tweezers to "send" the capacitor to the pad and solder it:

The next step is to solder another pin so that the small package components are soldered to the board.
vape pen puff desechables ,vape pen products ,vape pen price ,vape pen parts ,vape pen packaging in bulk
Shenzhen Aierbaita Technology Co., Ltd. , https://www.aierbaitavape.com