Electronic enthusiasts news: With the strengthening of the concept of energy saving and emission reduction, the Chinese people are more and more widely used in LED, especially in this era of unlimited creativity, making our own products that meet the needs will make us have more fun and achievements Sense; in 2012 is about to become a node of the past, the electronic enthusiast editors have sent the top ten LED lights DIY creative production to my dear readers and friends, hoping to bring you more unique design inspiration in the product development process.
1. LED light cube DIY
This content brings you the whole process of LED light cube production. Now only the cube part is completed. The cube with "USB online editing" function and the cube with "touch editing animation" will be launched later. No need to download the program to the future cube display To the one-chip computer, even supports high-level language editing animation, and does not require other third-party software to edit animation (clicking the mouse is a very painful thing), suitable for amateurs.
After the initial installation, it is like this:
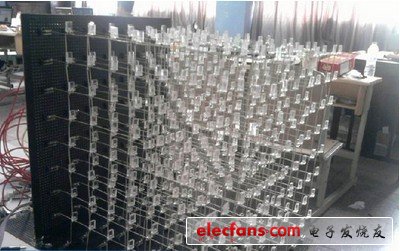
Behind it is beautification. After the software is debugged, if the hardware can work normally, it will begin to beautify, arrange the wires, fix them with hot melt adhesive, and surround the protective board to cover the circuit. I have to admit that I am not doing well with foreigners, but after all, people use 16-bit microcontrollers, the driving method is different, the natural circuit is different, this circuit is still complicated, but the principle is simple, and the program design is not difficult. ã€Details】
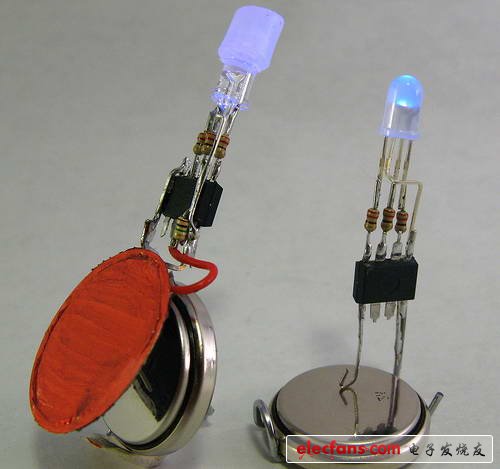
2. Unlimited creativity: DIY programmable LED toys
Recently studying AVR MCU, looking for examples to play everywhere.
The level is not enough, you can only start with a simple LED light. Let the LED flash at different rhythms according to the design of the program. And add a photoresistor as a sensor to achieve a richer control function.
Don't underestimate this light, it's really a bit of a joke.
First look at the finished product.
At the end of the article, there is a LED small toy program code. Welcome to download the programming code and DIY to make it. Experience the pleasure of making it for yourself. ã€Details】
3. Foreign electronic ghosts make their own super-complex LED coffee game table
Still borrowing that sentence, real warriors, dare to DIY their own life; real warriors, dare to DIY their own electronic products; real warriors, dare to use wires and transistors to DIY their own 65 microcontrollers, 4096 LEDs, A used LED coffee game table. The strongest part of this table is that 4 people can play at the same time, so after the success of DIY, it attracts the attention of many people.
DIY instructions
This project is the realization of the game "Ping Pong" with a new interesting game. The original idea of ​​this project was to design a coffee table with integrated LED lights. Our design and interaction of light-emitting diodes, the objects are placed on the table, they usually have about 400 led lights ... We think that simple interaction is not enough, to work in a mature game. As a true electronic ghost, we have an obligation to use 4 Atari 2600 controllers (products around 1977). ã€Details】

4. LED night light
Make a creative night light first on the finished picture
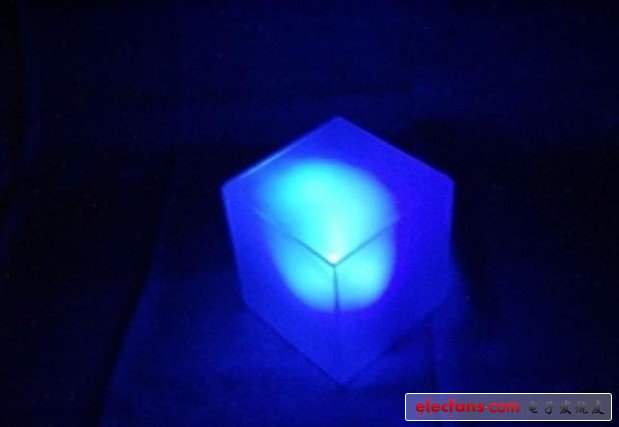
Small night lamp handmade steps: the first step: what you have to prepare
Fine sandpaper. 3 5MM LEDs. 6 pieces of 10CM * 10CM acrylic board. Hole board. 2 button batteries. 2 button battery holders. Touch the switch one. Heat shrinkable tube. wire. 3 seconds glue. Acrylic paint. water.
Tools: electric drill. air pump. drill. Airbrush. Polish the head. pliers. Pocket knife. scissors.
The second step: polishing
The LED and acrylic are all sanded with fine sandpaper. Be careful not to apply too much force, otherwise there will be scratches. ã€Details】
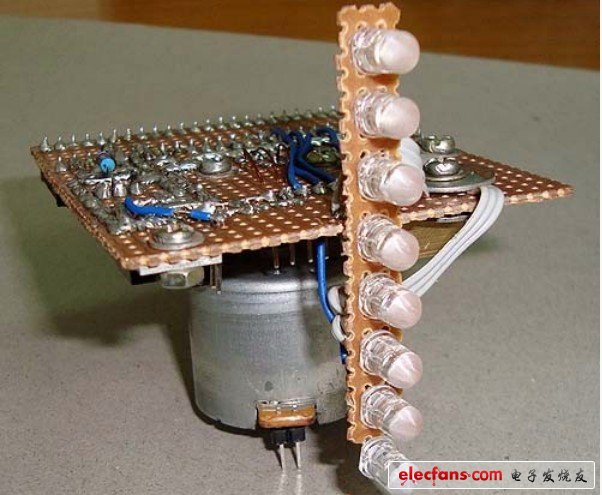
5. Engineer electronic production story: the whole process of rotating LED production
Production Method:
1. Modification of the motor
The power supply of the circuit and the positioning of the LED are a difficulty in this production. The circuit mounted on the motor is always rotating at high speed, and we cannot use the usual method to power the circuit. But we can solve it by transforming the motor. We all know that the general DC motor uses a coil as a rotor and a permanent magnet as a stator. He uses brushes to supply power to the coil, and the rotation of the DC motor requires an alternating current. This is accomplished by a commutator fixed on the rotor shaft to achieve a direct change from DC to AC. Our circuit is fixed on the rotor of the motor, and it and the rotor are kept relatively stationary. Therefore, we can get power from the rotor of the motor. The method is very simple, that is, the enamel wire is used to lead the electricity from the commutator of the motor to the circuit board, and after rectification and filtering, power is supplied to the single-chip circuit. When each electrode on the commutator changes is related to the position of the motor rotor, we can use one of the signals to locate the starting position of the LED display. ã€Details】
1000W Portable Power Station,1000W Power Station,Solar Power Generator,Camping Power Bank
Guangzhou Fengjiu New Energy Technology Co.,Ltd , https://www.flashfishbatteries.com